


So the end of the school year is coming fast upon us and I wanted to make something for my daughter's teacher like I did last year for her other teachers, but I wasn't sure what to do. Well I came across this blog months back about doing the initial of the teacher's name with crayons. I thought it was really neat and filed it in the back of my mind for later use. Well, now is the time for later use. I used her basic concept, but did a few things differently.
To start: gather your supplies for the main frame. I have my 10x10 shadow box, 2 sheets of felt, pack of foam letter stickers, scissors and double sided tape (not pictured).

I laid the pink down first, that's where I wanted to stick the letters for her teacher's name. I decided to use double sided tape because I thought it would look cleaner. I wasn't sure if glue might bleed through and then look like a mess....so I stuck with the tape. Then I put the foam stickers on to spell her teacher's name.

Once I thought it looked right, I added the other sheet of felt with double sided tape.


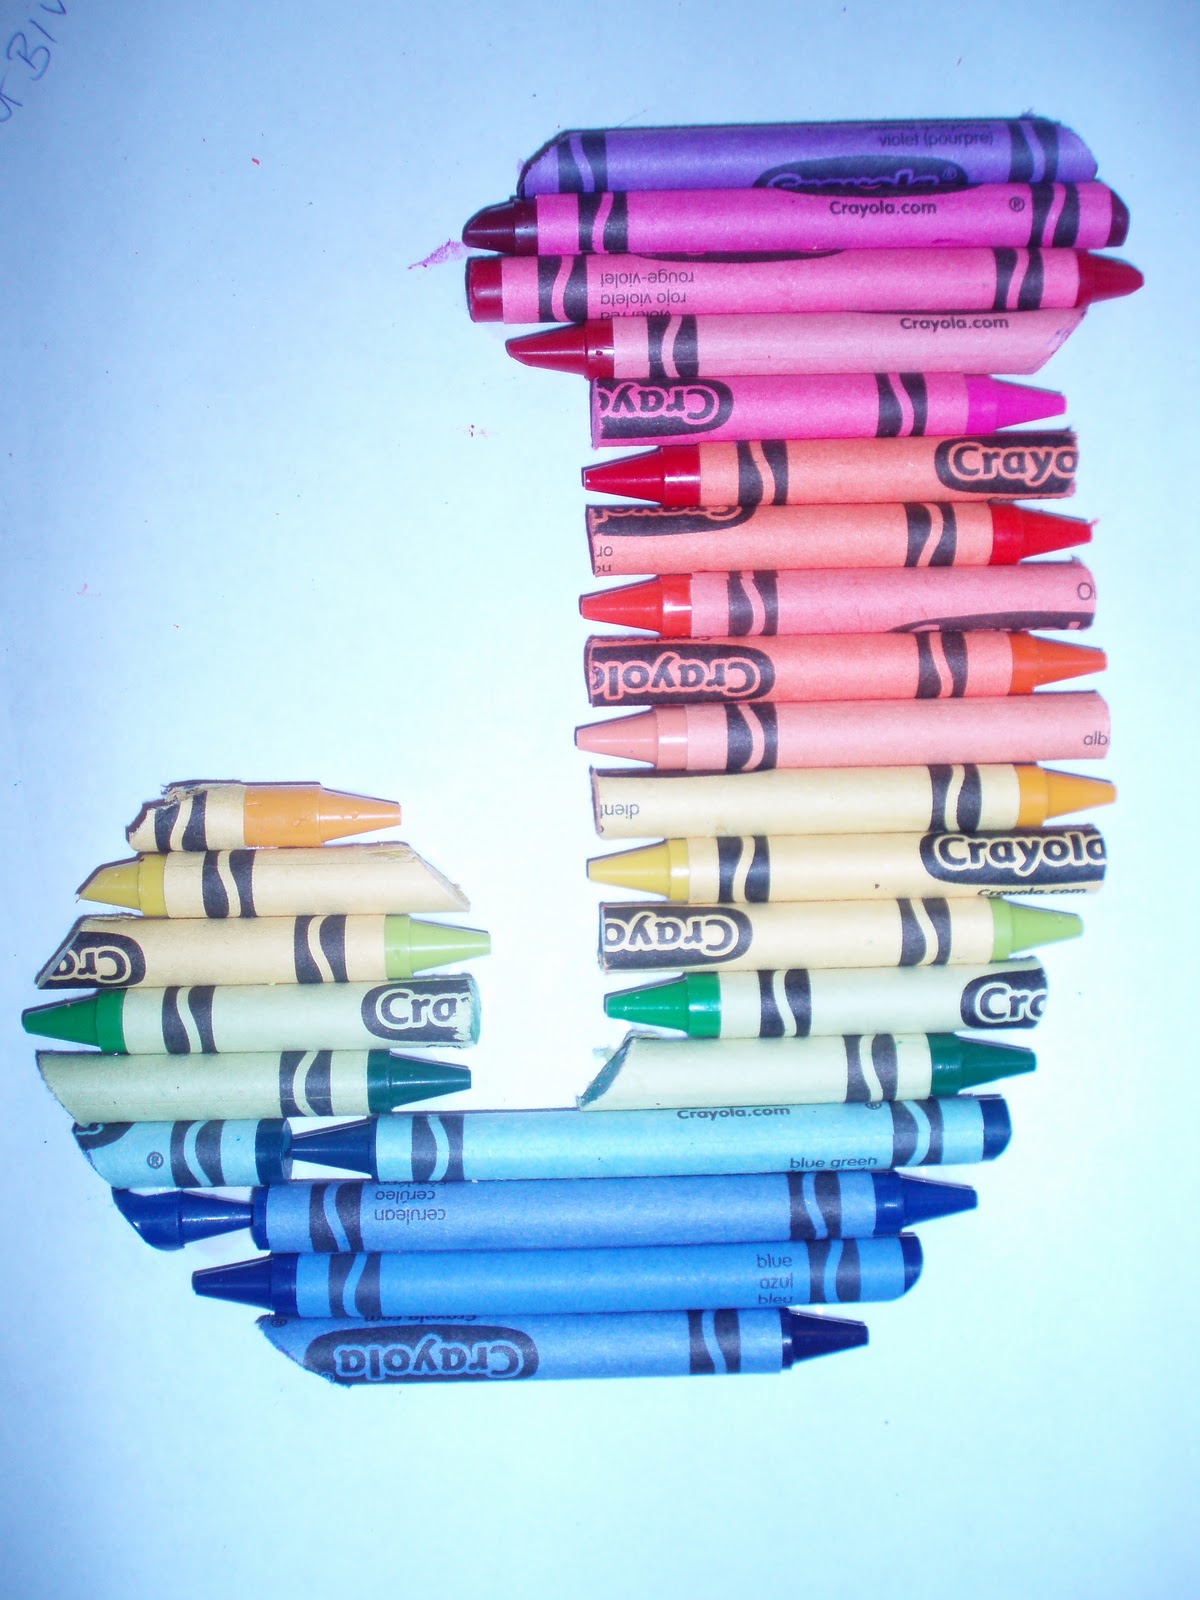
You can cut out the letter if you want (I couldn't since the white would show through instead of the gray felt but if you do this with just paper, it should work out fine.). I chose to cut the crayons and lightly glue them on the letter as I went to kind of hold them in place while I shaped the initial.
I found that marking them made it easier to know where to cut. I also alternated the direction of the crayons and followed a basic rainbow pattern; but it looks awesome when done haphazardly as well :o)

And here's the finished crayon letter!


Just peel the paper off and place in a nonstick pan (I chose a star shaped one)

Bake for about 10 minutes in a 300ºF oven.


Let them cool for about 15 minutes and then pop them out

And there you go, awesome crayons!
Have fun crafting!!


4 comments:
Genius! I'll be making two of these in the next month or so to give to E's teachers, since I'll be on maternity leave. :o)
SUCH a cute idea!! I'll be stealing this for Zach's teacher's!!
Wow, Morgan, you are so darn creative! Thanks for guest blogging, girly :)
Oh my gosh, that is adorable!!! Love that idea. My daughter and I just made some pretty crayons like those by melting them. I took pics too and was going to post them sometime :)
Post a Comment